With a few years of accumulated experience, cleaning the sensor (or rather the Anti-Aliasing [AA] filter in front of it) does not seem as dangerous as everybody believed… The only reported incidents I have heard of, seem to be scratches linked to rubbing on a hard mineral dust speck.
For about three years, I have been using a "contact free" ionization and blowing technique on my Canon EOS 20D. The idea is to generate a flow of positive and negative ions leading to an exchange of electrons with dust and AA filter, giving them back a neutral charge. With no more electrostatic charge, they will stop sticking to each other and blowed air will easily remove all dust.
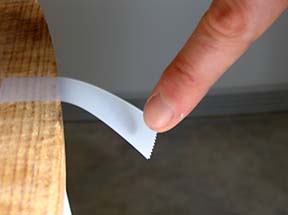
Nevertheless, twice this was insufficient (after photo sessions in seaspray)… And I had to gently rub with my finger wrapped with some 3M/ScotchBrite flat fibers microfiber tissue as suggested in the "Chasseur d'Images" french magazine.
Now that my Canon EOS 5D Mark II has an anti-static AA filter, I only clean lenses, filters, and the viewfinder screen using this technique inherited from VLSI integrated circuits production clean rooms to protect highly sensitive devices (examples).
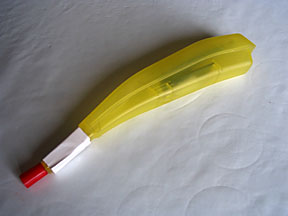
As I cannot justify an expensive Kinetronics ionizer like the one used by Alain BRIOT on his Canon EOS 1DsMkII (search for "dust cleaning" in this article), what I propose here is to build one based on a cheap piezzo-electric gas-lighter! If you are not a DIY person, then the MILTY Zerostat3 will do the trick if you use it as indicated below.
First, I would like to thank Iago on the "Chasseur d'Images" forum for sharing the idea, then Antoine (8 years old in 2005) for taking the pictures with his PowerShot A75, and finally Jean-Marie COELHO "ESD Consulting" (who is also a Nikon D200 owner) for his further knowledgeable advice and these slides on cleaning DSLR sensors with ionization. They are in french, but full of self explanatory diagrams.
Gas-Lighter Adaptation
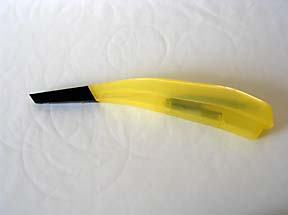
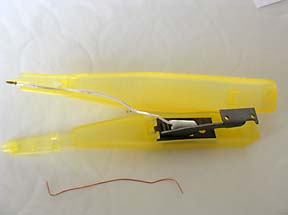
A brand new piezzo-electric gas-lighter.
With the help of a screwdriver…
Remove the metal head.
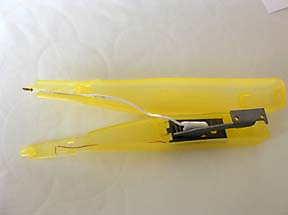
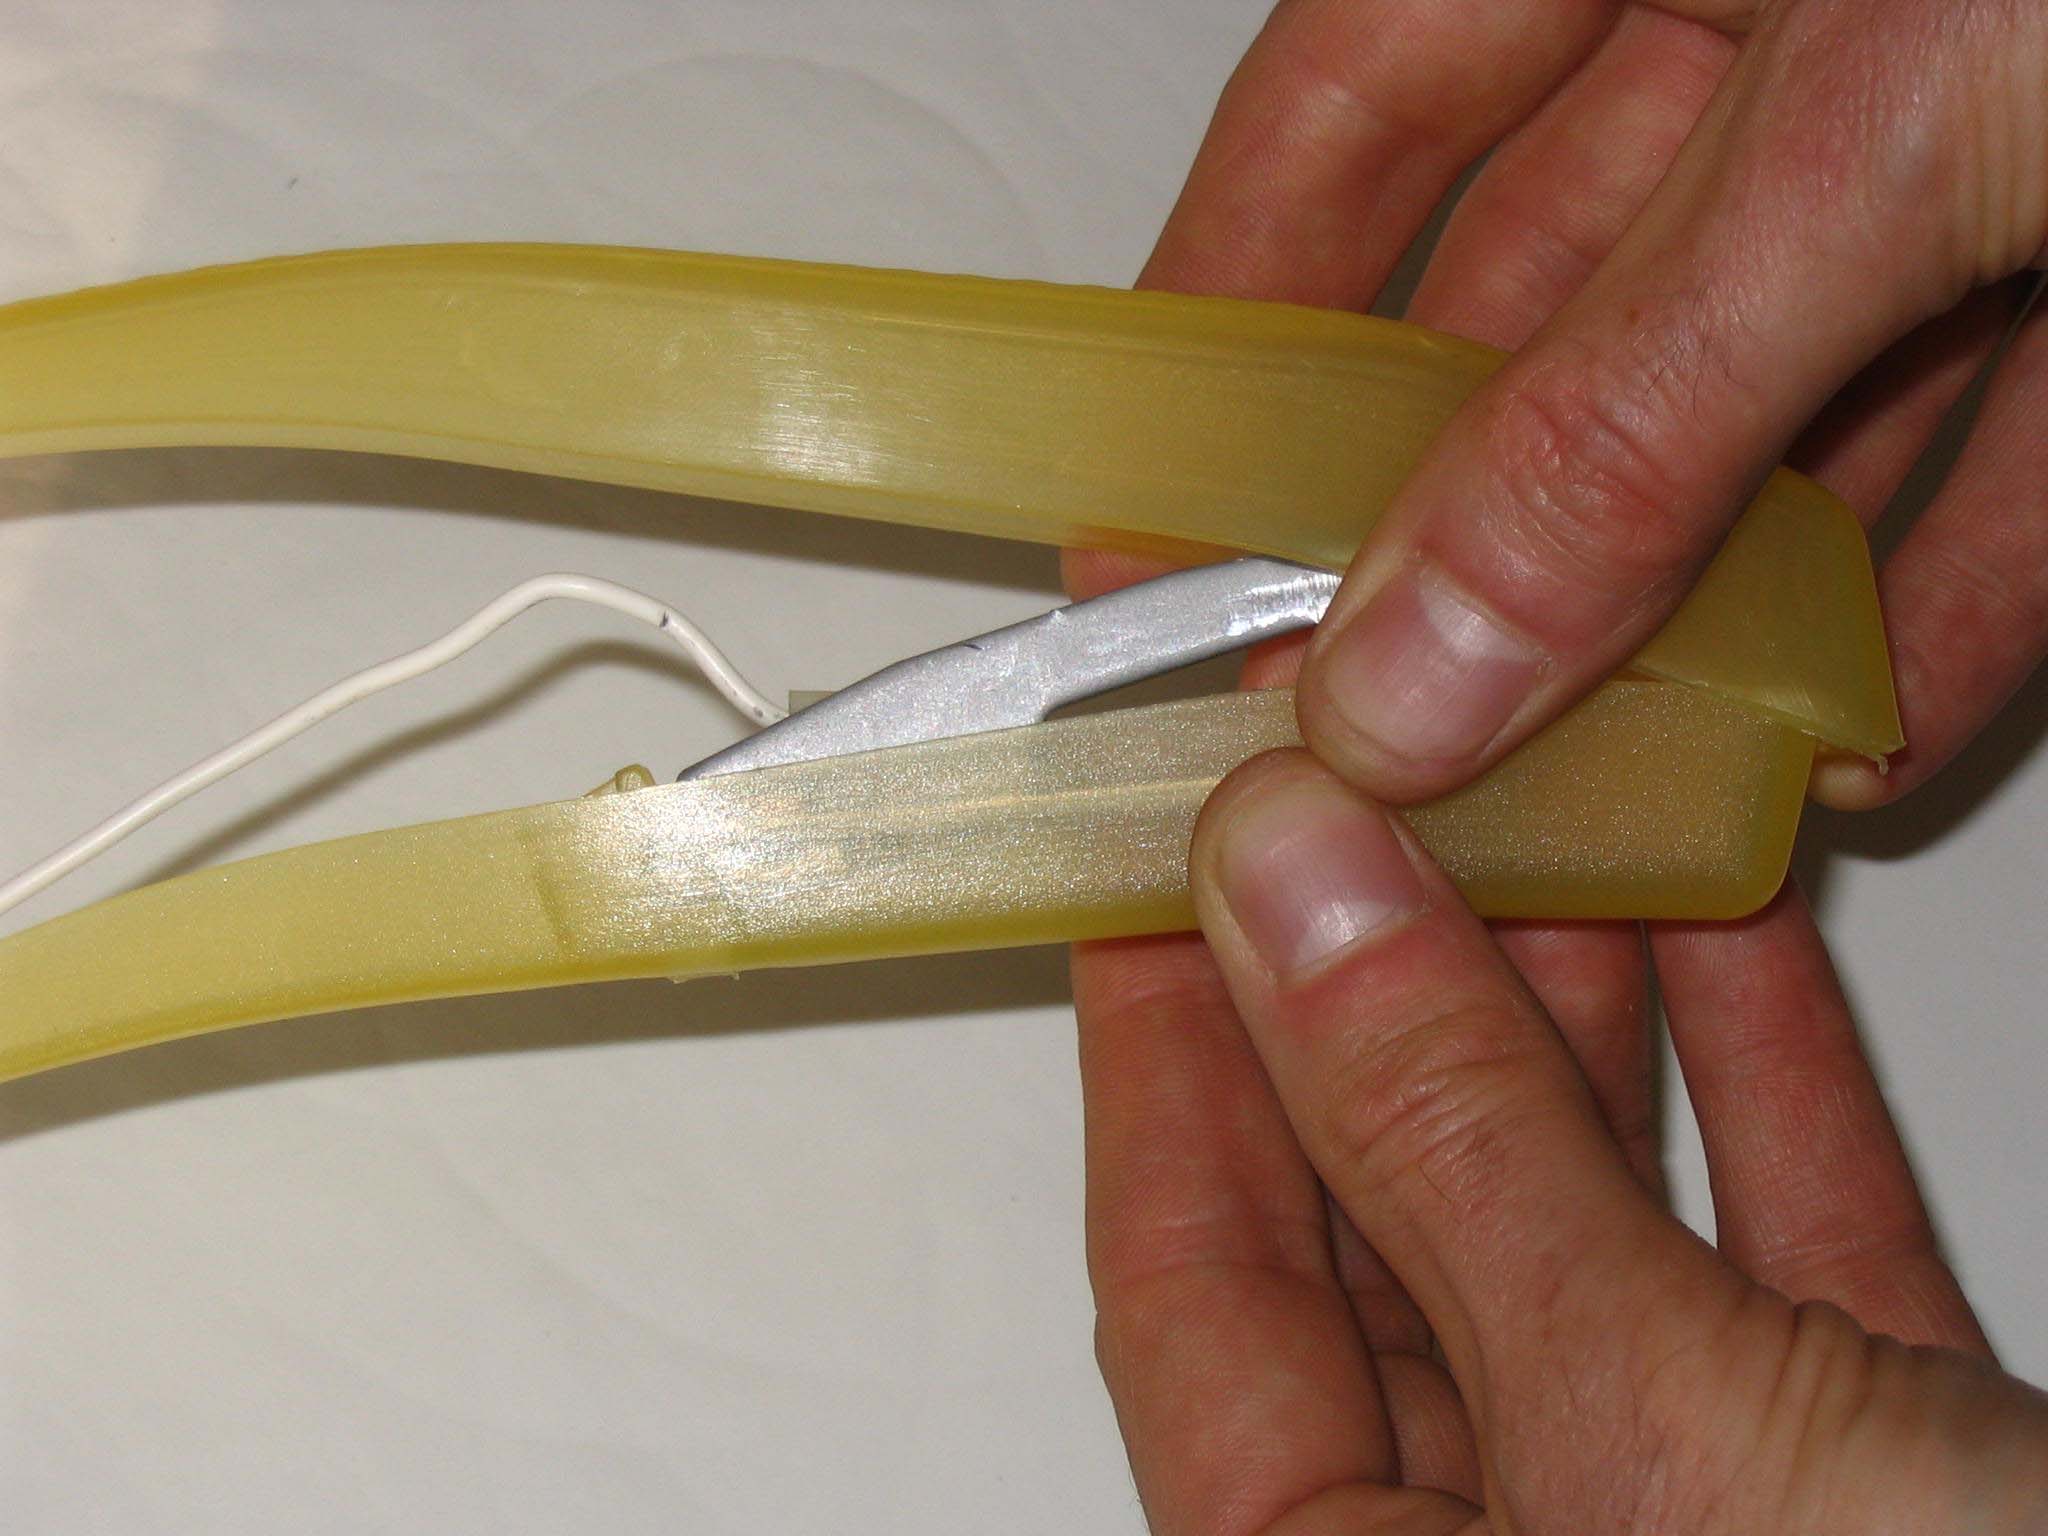
Delicately separate the body from the lever, paying attention to the center cable position.
Remove the grounding cable that's used to generate sparks.
Remove the central electrode as it is not sharp enough to ionize air, we will replace it with a pin.
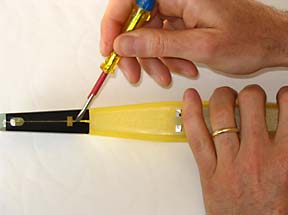
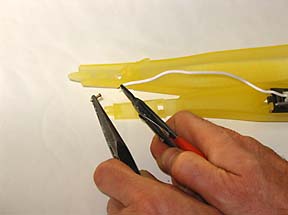
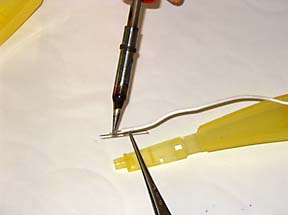
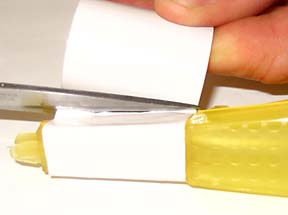
With a soldering iron, flux the central cable.
Also flux the pin.
Solder together the central cable and the pin (pointing outside).
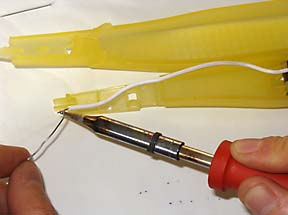
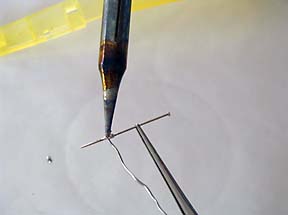
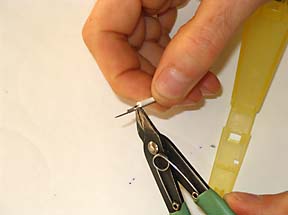
Cut the back of the pin for better further positionning.
Replace the center cable as before.
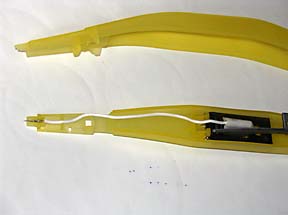
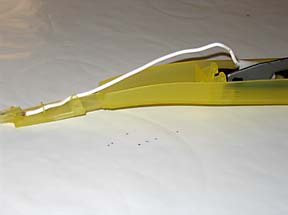
Put as much distance as possible between the central cable and the other metallic parts to avoid unwanted internal sparks.
On my sample, a notch needs to be positionned at the back of the gas-lighter body before closing.
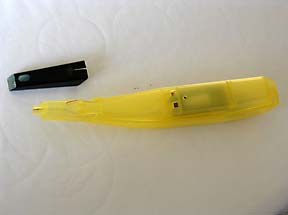
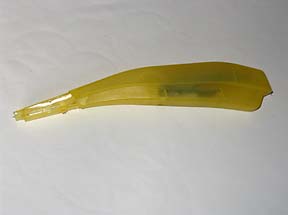
Close the gas-lighter body.
A large tape will bind the system.
Finally, Jean-Marie COELHO "
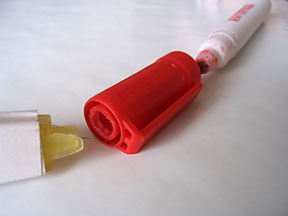
ESD Consulting", advised me to add a short plastic widening out tube to create an "ion gun" effect.
I used a whiteboard marker cap that I drilled and glued on the gas-lighter extremity. I cut it to adequate size and only kept its conical insides.
Et voilà, we will now call it "continuous flow ionizer", as without the ground electrode and when the lever is activated bothways about twice per second, positive and negative ions (depending on activation direction) will be generated at the pin point and ejected towards the target.
Approching the pin from your ear, you will hear air ionisation, this will enable you to adjust lever activation strength. If you depress it too strongly, voltage will raise high enough to generate an internal spark, which is harmless but not the desired result.
Testing the Ionizer
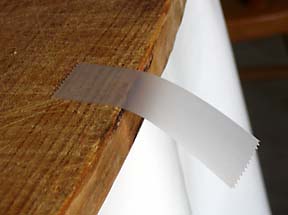
A piece of tape positionned at a table border is electrostatically charged.
If you move your finger near the tape, it will stick to it.
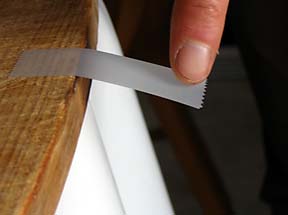
Directing your ionizer towards the tape at approximately 15 cm (6 inches) and actionning the lever for a short while, ionized air will discharge the tape. Mine still works at a distance of 40 cm (16 inches).
If you move your finger near the tape, it will not stick any more.
Using the Ionizer
To test your sensor, take a picture of a homogeneous surface (white surface or blue sky for instance), closing the aperture to f/22 or more. A dust particle is visible on this 100% crop.
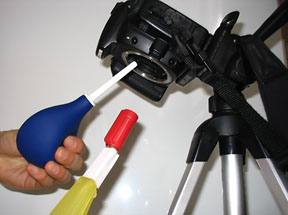
In a clean draft free area, with well charged batteries, camera on a tripod, sensor towards the earth, and in sensor cleaning mode, direct your ionizer towards your sensor at approximately 15 cm (6 inches), actionning the lever as indicated above while simultaneously blowing to remove neutralized dust particles.
It is now clean... and furthermore discharged; dust specks are not attracted any more for some time and especially while replacing your lens!
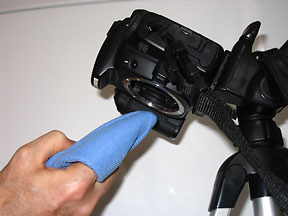
I avoid as much as possible touching my sensor (or rather the AA filter). Nevertheless, when some spot needs some rubbing, I gently use some 3M/ScotchBrite flat fibers microfiber tissue as suggested in the "Chasseur d'Images" french magazine. Only use your finger pulp to get a precise feel of the pressure on the filter.
Do not forget to ionize/blow before (to remove any potential scratch prone mineral dust speck), and after (to discharge the filter that has just been charged by rubbing and attracts dust).
If you have big fingers or long nails, traditional methods like Sensor Swab are recommended :-)
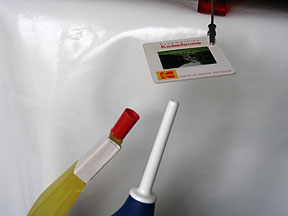
This system is also very useful to remove dust from my old Kodachrome slides, as ICE dust removal software doesn't work with those slides on my Nikon Coolscan IV scanner… But don't hesitate to use it for any other kind of dust removal: lenses, screens, glasses, etc.
Purely formal disclaimer: you are using this information at your own risk.
I disclaim all responsabilites for any damage or injury, either personnal or material,
resulting from the use of the information contained on this page.